Congratulations on writing your first blog post with us! Now that you’ve gotten the hard part out of the way, you want to make sure people appreciate all your efforts by being able to connect your blog posts back to you. That’s why you need to sign up for Google authorship, and it couldn’t be an easier process.
The objective of this is to verify you as the author of the articles you have written on IT World Canada using Google+. Why would you want to do this? In short, Google is making the “who” of content just as important as the “what” of content on the Web. It’s awarding credibility points for original articles written by an identifiable author that claims ownership to that article and the publication it is carried with.
Once your Google+ authorship is established, your name, which will act as a link to your Google+ profile page, will start appearing alongside your articles in Google search results. Much like this:

Note, your picture will only show when Google deems it to be useful to appear for the reader.
The process will not take more than five minutes to complete. Let’s dive right into it.
Step 1: Ensure that you have a complete Google+ profile. When readers come across your profile, they should not be greeted with empty spaces or a blank image. Fill in all the necessary details and keep a good profile and cover picture.
Step 2: Next you need to let Google know you’re an author that appears on ITWorldCanada.com. Here’s how to do it:
- Click on the about button in your Google+ profile.
- Then go to the bottom and you will find a Links section. Click Edit.
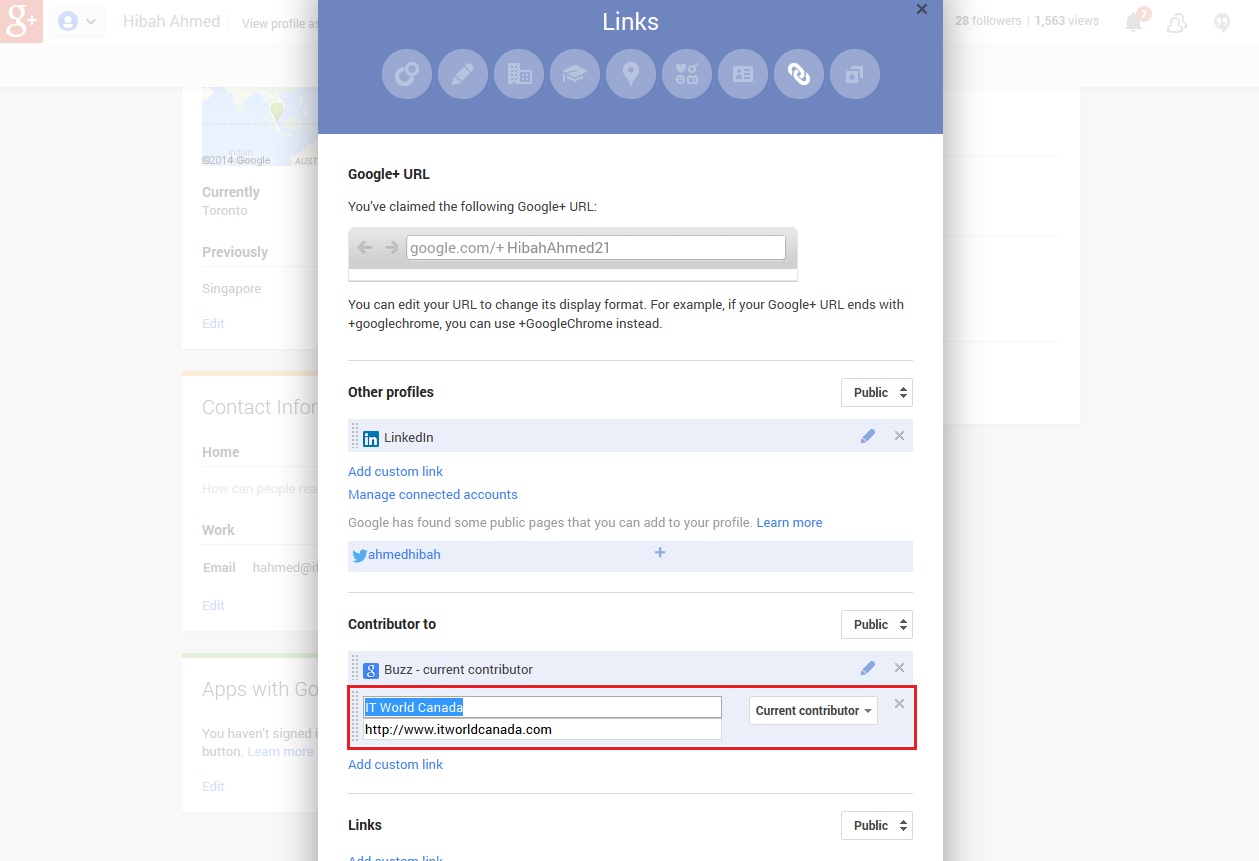
- In the links pop-up window, find Contributor to and then click add custom link under that section.
- In the Label box type IT World Canada and in the URL space, type http://www.itworldcanada.com
- Then go to the bottom and hit the save button.
Step 3: Login to your IT World Canada WordPress account and click on your profile (Seen as Howdy, and your name, on the upper right hand corner).
Step 4: Scroll down and you should see space for Google+. Fill in your Google+ account ID and then type in, immediately after it –?rel=author
So the final result will look something like this:
https://plus.google.com/+YourUserName/?rel=author

Then go to the bottom and click update profile. That should save your Google+ ID in WordPress.
Step 5:
Now we need to check if you have done this correctly.
Go to http://www.google.com/webmasters/tools/richsnippets . Copy-paste your article URL and then click preview. You should see the following if you have done everything correctly.

Now you’ve gotten your Google authorship verified!
Don’t forget to make sure you’re also read how to write a post and edit a post on WordPress. Once you’ve read all three, you’re all set! Good luck and happy blogging!