


Once you’ve mastered creating a new post using WordPress, the next step is learning how to go back and make edits as needed. Below you’ll find step-by-step instructions on how to edit your blog post:
1. Login to http://www.itworldcanada.com/wp-login.php with the username and password you’ve been provided.
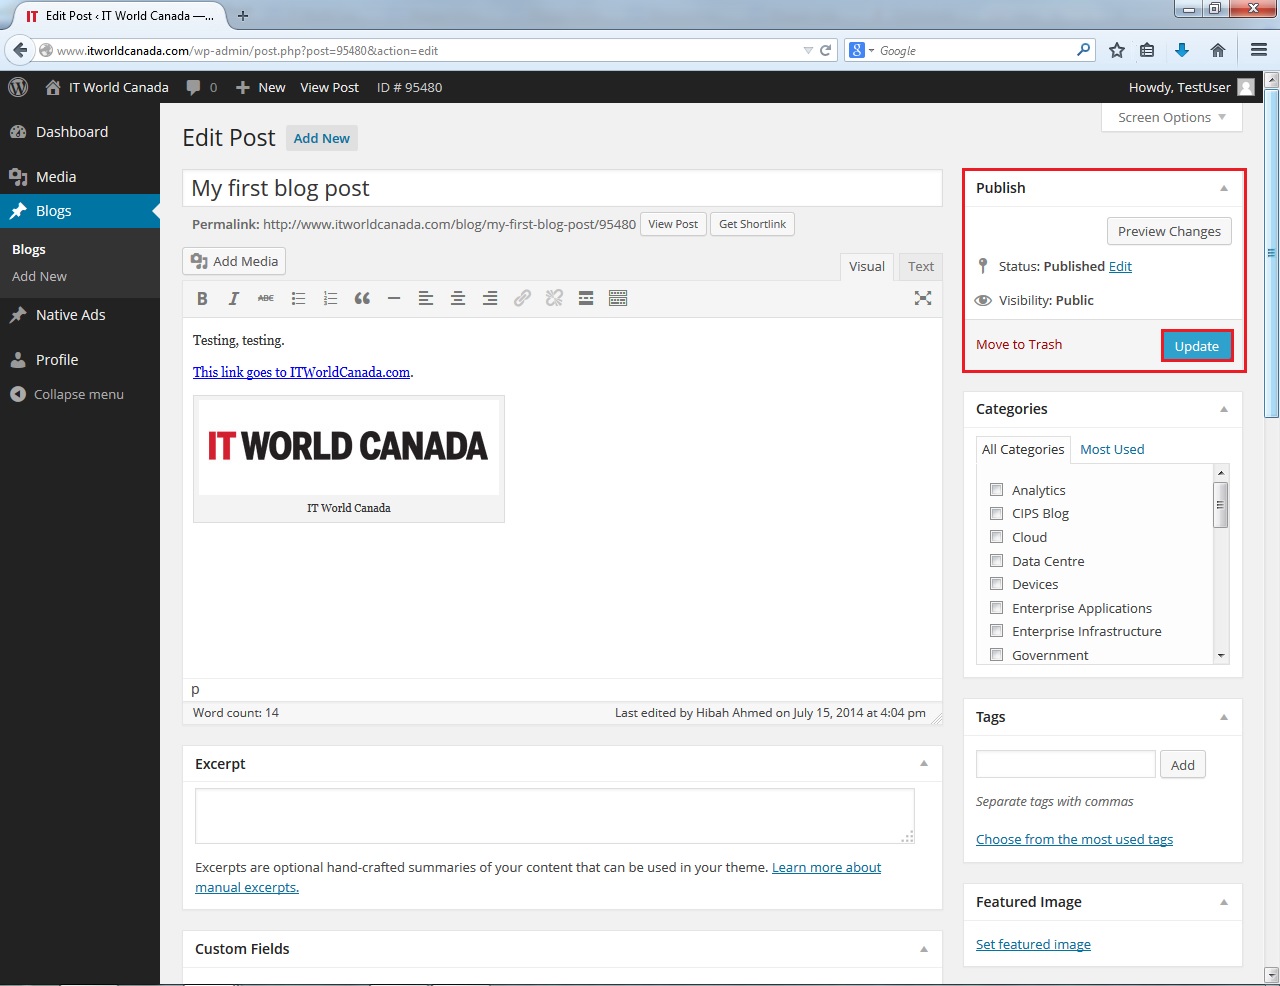
2. Go to the “Blogs” section on the left hand column. You’ll be able to see the posts of all bloggers, but only be able to edit your own.

3. Find the item you’d like to edit (tip: you can search for your title, or view all “Pending” posts).
Click “Edit” underneath the title of that post.
Click “Edit” underneath the title of that post.
4. You can edit the text or add images now as you see fit. To add an image click “Add Media” on the upper left hand side of the text box, and insert either a image’s URL or upload a file to use.

5. Enter the caption for any images you’re inserting including the source of that image. Eg. Project management means people management. (Image source: Shutterstock.com).
6. Adjust the size of the image to look great on the page. You can edit the image in this way by clicking on it, then clicking on the picture icon in the upper left-hand corner.
– Hover over the image in the post and look for the pencil icon to edit
– This brings up the “Image Details” window
– Look at the “Size” option and click to select “full size”
– Or you can select custom size and type in a pixel width. The dimensions should adjust automatically to maintain proportional image size.

7. Click the blue “Submit for review” button (if not published yet) or “Update” button if its already published.
10. Remember to use “preview” to look at your changes to make sure they appear as expected.
Now that you’ve successfully made a blog post, a great way to increase traffic and associate all your posts with you is to verify yourself with Google Authorship, which you can learn how to do here.